Creating User Bean Templates
If you frequently use a bean with the same specific settings,
you may save the bean with its settings as a template. This template is
displayed in the Bean selector under given
name, behaves as a normal bean and could be added to any project.
The template has the same properties as the original bean. The values of
the properties are preset in the template and could be marked as read only. Click the right mouse button on the selected bean icon on the Project
panel in order to display the Bean
pop-up menu.
Select the Save bean settings as template item to open the Bean
Template dialog window which allows to create and save the template.
Dialog window has the following parts: After clicking the OK button, the bean template is saved and
automatically added to the Beans Selector tree. If you click Customize settings... button in the Bean Template
dialog the Template Editor dialog window is shown and you can make the
following changes into the template:
Finally, click the
In this section, we will show how to create a bean template and save it.How to Create and Save Templates.
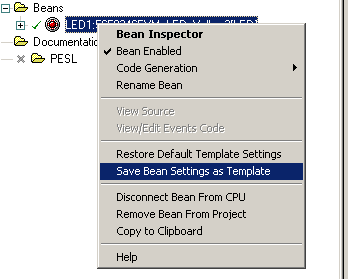
Figure 1 - Bean Pop-up
Menu
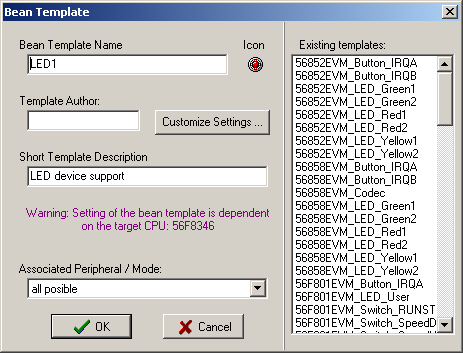
Figure 2 - Bean Template
Dialog
Customizing Bean Template Settings
![]() - feature is ReadOnly.
- feature is ReadOnly.
![]() - feature is Changeable.
- feature is Changeable.
Possible values:
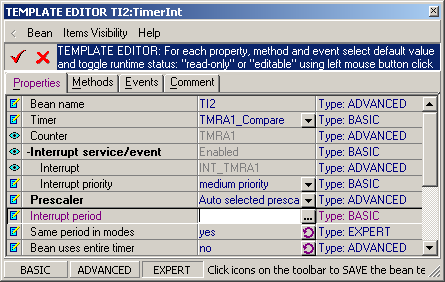
Figure 3 - Template
Editor Window
![]() icon on the bean inspector's toolbar to accept the changes.
icon on the bean inspector's toolbar to accept the changes.
To discard the changes and return without changing a template settings
close the window or click the ![]() icon.
icon.